With a price of €150 the De’Longhi Dedica EC685 is by far the cheapest portafilter espresso machine one can get. It is the successor to the EC680 model with minor differences in frother and tray.
Out of the box the EC680/685, despite the overwhelmingly positive reviews, delivers horribly tasting espresso: Sour, bitter and lifeless. If you ask why there is such a discrepancy between reviews and results, I guess it’s because many reviewers simply don’t know what to expect.
With the right modifications you can get espresso shots tasting equally as good or better than in most cafe’s. The modifications come at a price: at first your espresso will taste far worse than before! But: You’ll receive the ability to tune the extraction process and hence the taste and flavor.
Necessary modifications
It’s actually very simple: Replace the basket, get a bottomless portafilter and strip the frother.
The biggest issue comes from the original pressurized baskets. Baskets found in gastronomical espresso machines have plenty of laser cut holes. The EC680/685 has exactly one hole. Because this machine uses a vibratory pump, pressure is build up by blockage of the pathway. To deliver somewhat constant pressure the basket is designed such that it forces the water through a tiny hole, this is why it’s called a pressurized basket.
So how do you achieve constant pressure without a pressurized basket? The answer is simple: By grinding your beans extremely fine, so fine, that the ground beans act as a natural counterpart for the vibratory pump. This of course comes with a plethora of new issues, but none which a true barista would mind learning to deal with.
A bottomless portafilter
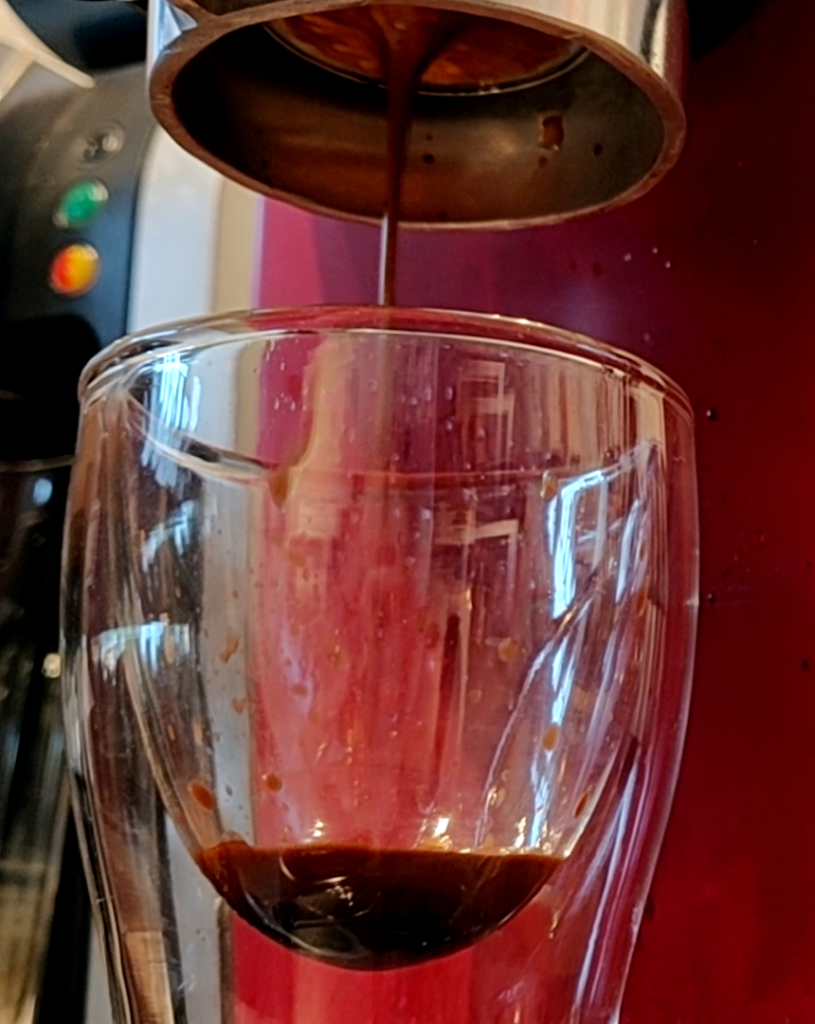
This is a MUST have if you want to learn anything remotely about your coffee extraction. By opening up the portafilter you’ll get a clear glimpse at the shape and color of the extraction stream and also potential flaws in your coffee tamp.
For my project I ordered an original DeLonghi portafilter and cut down both the portafilter holder and the included basket with a Dremel tool:
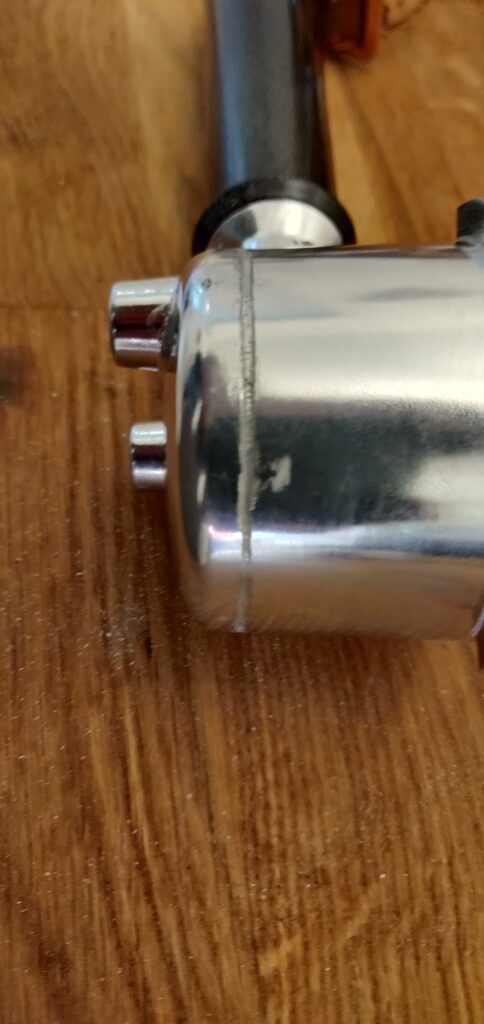
Saw right below handle junction 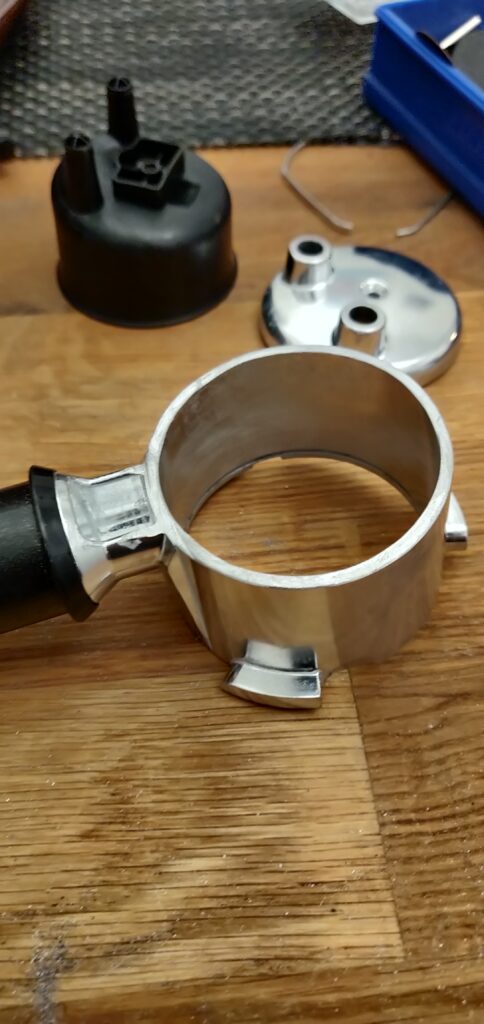
Don’t forget to deburr edges!
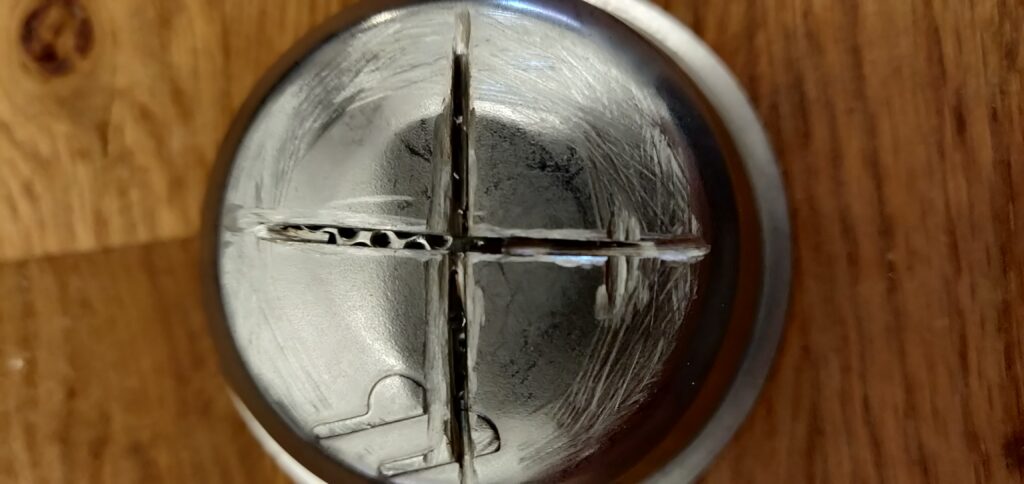
It’s best to cut round the outside 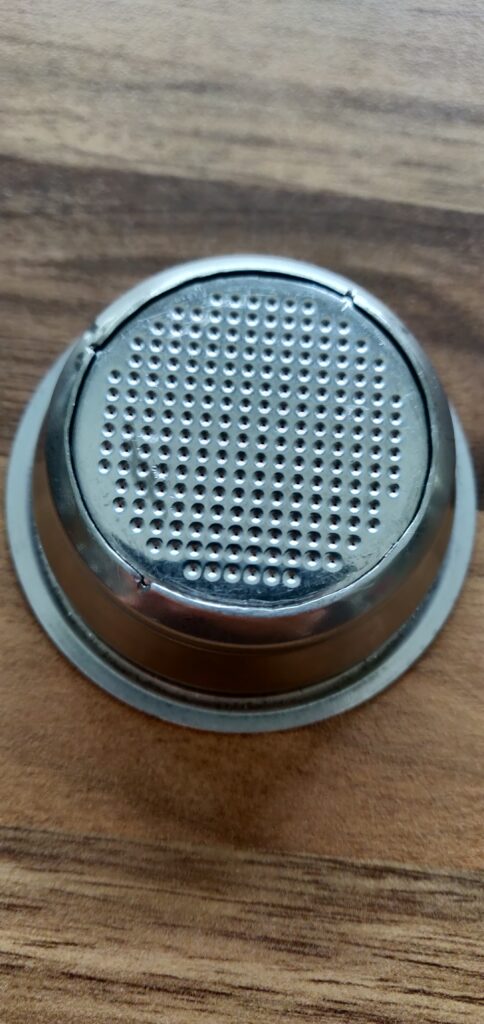
Final result
Graef filter baskets
A standard recommendation for the EC680/685 are these Graef filter baskets, comparable to VST baskets on the German market. I have tested them and I do not recommend them for this machine!
One important metric for sieves is the nominal open area of the basket, i.e. the ratio between open and closed surface. If you have more or bigger holes you have more open area than with a few tiny holes. Now there are two problems with the Graef sieves: 1) The nominal open area is too large and 2) The 14g basket is missing the conic shape necessary for building up the required pressure!
So overall, you’ll not be able to reduce the extraction flow and hit the correct extraction times and yields using these baskets. The modified original basket on the other hand, both though its conic shape and smaller holes, is able to hit almost perfect extraction parameters.
Fundamentals of espresso
No matter what machine you have, without quality roasted beans you’re not going anywhere. Even though it’s temping to buy cheap beans for learning I wouldn’t recommend doing so: Uneven roasts, bean sizes and fragments all lead to an unpredictable extraction and varying results.
Now, given you have the right beans you’ll have to make sure that you understand the coffee extraction process. We have the following parameters to play with, ordered by importance:
- Grind size, from coarse to very fine
- Brew ratio
- Water temperature
Grind size
We’ve already learned that the grind size controls the pressure in this machine. For espresso, the finer you grind, the more area is created for the water to extract. Generally, you’ll want to go as fine as possible. We’ll get into the physics another time, for now this rule of thumb are enough to find the perfect grind setting:
- Grind so fine that you choke your machine (nothing comes out, machine aborts process)
- Set the grinder one step coarser at a time until you see a very slow but constant flow
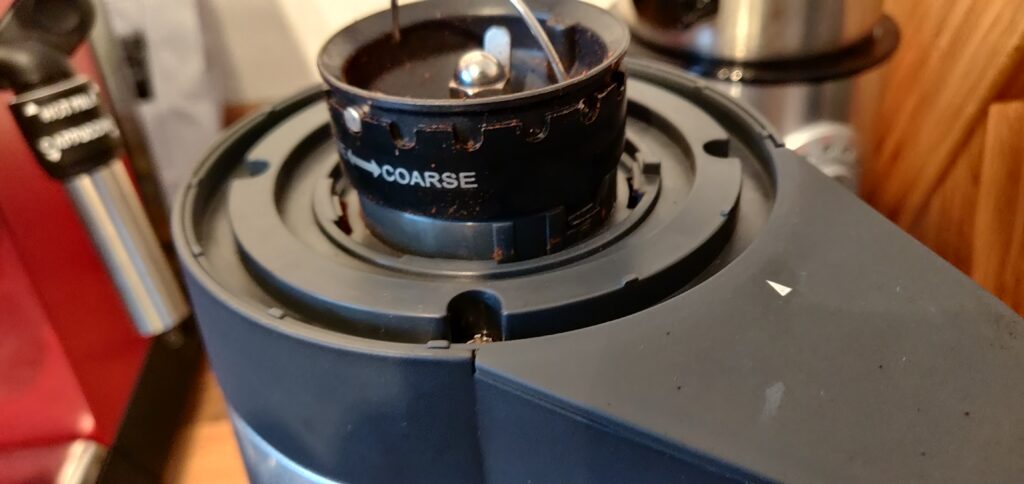
Many people like me bought the Graef CM800 grinder together with their DeLonghi machine. This grinder has one flaw: It’s not specifically designed for espresso-grade grinds. It can, however, be „fine-tuned“, by removing the outer shell, removing the screw on the inner grinder and rotating the inner piece three steps in FINE direction (inner piece clock-wise). The effect of this is that the outer scale (the one you normally look at) gets shifted to the left: What was before the grind setting „5“ now becomes „15“. This gives you more room to work with finer grind settings. Another thing is that pressing down on the hopper while grinding helps getting a more even grind.
If your grind and tamp are not even enough you’ll get what’s called channeling: Water under pressure seeks the path with lowest resistance, creating channels. The presence of channels the bottomless portafilter is noticeable through coffee spurts in random directions. Because the contact time of this channeled water with the coffee is almost non-existent, this water will taste sour and body-less if it makes way into the cup.
Chances are that this is what you’ve been drinking before, because with the normal portafilter defects in the tamp are invisible. Once you get a constant, single stream your tamp is free of channeling and your coffee is guaranteed to taste well.
Brew ratio
The next thing you want to set up is the brew ratio, i.e. the weight of the ground coffee beans vs. the weight of extracted coffee (including water). Don’t rely on the specs of the basket, measure the weight of the portafilter with and without the ground coffee and you have your input weight. Stay constant with your input weight, learn to always dose in the same amount without gauge.
Then, measure the weight of the cup without coffee and with coffee to get the output weight (the yield). Now divide the output weight by the input weight and you have your brew ratio. If your output weight is around two times as much as the input weight (brew ratio 1:2), voila! If not: press and hold the start button on the machine for one or two cups to program the extraction time. If you need more coffee in the cup, you need more time, if it’s too much coffee in the cup, you need less time. Adjust the time by releasing the cup button sooner (less time) or later (more time). You’re done once you hit your brew ratio for consecutive trials.
See how extraction time is not really a parameter you set. You only set up the grind size and brew ratio, extraction time is just a result. If the time, given the correct grind setting and brew ratio, is around 20 seconds, good, if not, ignore.
Water temperature
Many guides recommend 92 degrees as the extraction temperature for espresso. With the EC680/685 we have no direct control over the temperature and the temperature itself is very instable: Depending on whether it’s the first, second or third coffee in a row the temperature changes, but also across the extraction the temperature drops quickly.
The EC680/685 has the option to change the temperature from low, middle to high. After testing all settings (and doing tricks like „temperature surfing“) I recommend leaving the temperature setting untouched! While not perfect, the machine is able to produce temperatures high enough to deliver good extraction. Only one thing is extremely important: Preheating the brewing group! This is easily done by removing the portafilter and then making one cup of coffee without coffee.
There have been some studies on the importance of temperature in coffee extraction. Up to a certain point, gradually more coffee practicals get dissolved as the temperature increases. But we’re talking about minor varieties, bean/roast quality and grind size are far, far more important!